


Active Topics
-
Is there a section to talk about Java ME? Apps, etc. (0)
to General by Kalatti - 2 days, 7 hrs ago -
Extra softwares in Sailfish using CLI, repositories, etc (117)
to SailfishOS by nieldk - 4 days, 4 hrs ago -
Firefox with Leste (6)
to Maemo 7 / Leste by teroyk - 5 days, 1 hr ago - more...

| The Following User Says Thank You to pichlo For This Useful Post: | ||

|
2020-08-04
, 13:50
|
|
Posts: 697 |
Thanked: 1,980 times |
Joined on Jun 2015
@ Lisbon - Portugal
|
#2
|
Originally Posted by pichlo

Hope this can help
The subject says it all. The sound from the earpiece during a call is very distorted, to the point it is hard to understand the other person. They say they can hear me fine. The sound is fine when I switch to the loudspeaker or through my car speakers via Bluetooth. It is literally just the earpiece.
I searched TJC and found this post from 2014 which describes exactly my problem. One answer suggests to clean the earpiece. I tried as much as I could but it made no difference, probably because I only managed to do what the poster did and clean only the parts I could reach. I could not reach the actual earpiece because it is burred under the main PCB and I could not figure out how to take it out.
Has anyone had a similar issue that they managed to fix? Is it even worth trying? If so, how can I remove the PCB without breaking something? It gives quite some resistance to removal.
https://pt.ifixit.com/Teardown/Jolla.../53435?lang=en
| The Following 3 Users Say Thank You to deutch1976 For This Useful Post: | ||
|
|
2020-08-04
, 14:46
|
|
Posts: 803 |
Thanked: 1,585 times |
Joined on Aug 2014
|
#3
|
Originally Posted by pichlo
Whilst haven't done it for a while, can't remember any problems upon the last two occasions with two different phones. As in the UK if you want earpiece, microphone or vibrator just ask.
Has anyone had a similar issue that they managed to fix? Is it even worth trying? If so, how can I remove the PCB without breaking something? It gives quite some resistance to removal.
Have now disassembled another Jolla 1 and points to note:
1) Volume up/down button always falls out although obvious by slots in casing which is up and down.
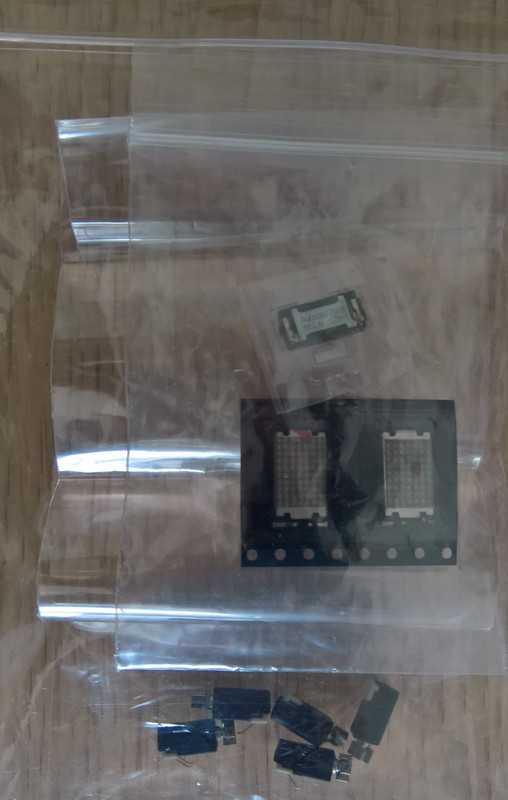
2) When removing circuit board make sure that proximity sensor (black rectangle) comes out of housing as is a tight fit. There are two plastic lugs one on each side of circuit board, so need to prise board up at these points.
3) Note the way two connectors (by green barcode label) sit on top of each other before dis-assembling.
4) Antenna plug is probably most fiddly and easy to damage.
5) Two connectors by battery always fall flat and need lifting out of the way when reassembling.

Last edited by aspergerguy; 2020-08-04 at 18:09. Reason: Addition
| The Following 4 Users Say Thank You to aspergerguy For This Useful Post: | ||
 |
|
2020-08-04
, 17:25
|
|
Posts: 6,445 |
Thanked: 20,981 times |
Joined on Sep 2012
@ UK
|
#4
|
Originally Posted by deutch1976
Thanks, Deutsch. I knew there was a disassembly guide somewhere.
Hope this can help
https://pt.ifixit.com/Teardown/Jolla.../53435?lang=en
I failed on steps 7 and 8. Those things looked like connectors but the whole flex cable looked too flimsy and I did not want to break it.
Originally Posted by aspergerguy
Thanks. Hopefully it won't be necessary but if so, I know who to ask. Much appreciated.
As in the UK if you want earpiece, microphone or vibrator just ask.
__________________
Русский военный корабль, иди нахуй!
Русский военный корабль, иди нахуй!
| The Following 2 Users Say Thank You to pichlo For This Useful Post: | ||
|
|
2020-08-04
, 18:17
|
|
Posts: 803 |
Thanked: 1,585 times |
Joined on Aug 2014
|
#5
|
Originally Posted by pichlo
The two connectors @7 align upon their sockets very easily, provided you notice how ribbons fold on top of each other when dis-assembling. You are correct that antenna plug @8 probably only point when magnification would make process a little easier.
I failed on steps 7 and 8. Those things looked like connectors but the whole flex cable looked too flimsy and I did not want to break it.
| The Following 3 Users Say Thank You to aspergerguy For This Useful Post: | ||
|
|
2020-08-05
, 22:18
|
|
Posts: 6,445 |
Thanked: 20,981 times |
Joined on Sep 2012
@ UK
|
#6
|
Originally Posted by aspergerguy
Thanks again. The volume buttons (1), the tiny coax(?) connector (4) and the screen(?) connectors (5) were not an issue at all. The most challenging bit was persuading the front camera (2, the black rectangle, you refer to it as proximity sensor) to come out. It was not only a tight fit but also fixed with a sticky pad. And of course the two flex connectors (3). The end of the top one was glued to the metal shielding with some sticky substance and I was a bit worried, but it came off quite easily.
Have now disassembled another Jolla 1 and points to note:
1) Volume up/down button always falls out although obvious by slots in casing which is up and down.
2) When removing circuit board make sure that proximity sensor (black rectangle) comes out of housing as is a tight fit. There are two plastic lugs one on each side of circuit board, so need to prise board up at these points.
3) Note the way two connectors (by green barcode label) sit on top of each other before dis-assembling.
4) Antenna plug is probably most fiddly and easy to damage.
5) Two connectors by battery always fall flat and need lifting out of the way when reassembling.
In the end, I made things even worse. I got to the earpiece and it looked clean, but I could not take it out and could only see its back. So I merely pushed the spring contacts up a bit to make a better contact. That may have been a mistake because the sound is even more distorted than before. Perhaps the springs push on the speaker too much and the membrane is squashed. Which actually gives me some hope. The distortion sounds exactly like before, only stronger, which means the reason was possibly some dross pushing the membrane. I can try to take it apart again and have a closer look, but it may take another day or two. If I fail again, I will take up your kind offer.
__________________
Русский военный корабль, иди нахуй!
Русский военный корабль, иди нахуй!
|
|
2020-08-06
, 13:33
|
|
Posts: 803 |
Thanked: 1,585 times |
Joined on Aug 2014
|
#7
|
Originally Posted by pichlo
Thanks for pointing out my error, having a "senior" moment forgetting left becomes right when turning device face down
The most challenging bit was persuading the front camera (2, the black rectangle, you refer to it as proximity sensor) to come out. It was not only a tight fit but also fixed with a sticky pad.

|
|
2020-08-11
, 09:56
|
|
Posts: 6,445 |
Thanked: 20,981 times |
Joined on Sep 2012
@ UK
|
#8
|
Well I'll be a monkey's uncle! I finally got around to trying again. Took it apart, but still struggled to remove the earpiece. Eventually I prized it out with a very sharp knife and... it split apart! One block with the magnet and connectors came off but the membrane with the wire coil stayed stuck inside. The wire is thinner than hair (though it may be just my impression) and the magnet block was precariously hanging, literally by a thread. "That's it", I thought, "I will have to beg asperguy's forgiveness for publicly pointing out his 'senior moment' and try a last ditch effort with his spares."
With a small heart (an idiom from my first language meaning "with trepidation"), I put the whole thing back together and... IT WORKS! I fixed it! The sound is as clear as can be. I am a magician!
But that's it. Some of the screw became so loose after repeated disassembly that I may not be able to put it back together again. So if it breaks again I will probably fix it with a big hammer.
__________________
Русский военный корабль, иди нахуй!
Русский военный корабль, иди нахуй!
|
|
2020-08-11
, 10:50
|
|
Posts: 803 |
Thanked: 1,585 times |
Joined on Aug 2014
|
#9
|
Originally Posted by pichlo
Don't do that, I can always do you a swap with one that works
So if it breaks again I will probably fix it with a big hammer.
| The Following User Says Thank You to aspergerguy For This Useful Post: | ||
|
|
2020-08-14
, 17:00
|
|
Posts: 6,445 |
Thanked: 20,981 times |
Joined on Sep 2012
@ UK
|
#10
|
Final update: I was not entirely happy with the sound. It was clearer than before, but not as good as I would like. So I took up aspergerguy's kind offer and swapped the earpiece. As I am sure you are all keen to hear, the operation was successful, the patient is... alive!
The only casualty was one T5 screw. I managed to damage the head, so the screwdriver does not grip it any more. I did not think T5 screws could be stripped like that, but apparently yours truly is capable of the impossible.
The only casualty was one T5 screw. I managed to damage the head, so the screwdriver does not grip it any more. I did not think T5 screws could be stripped like that, but apparently yours truly is capable of the impossible.
__________________
Русский военный корабль, иди нахуй!
Русский военный корабль, иди нахуй!
I searched TJC and found this post from 2014 which describes exactly my problem. One answer suggests to clean the earpiece. I tried as much as I could but it made no difference, probably because I only managed to do what the poster did and clean only the parts I could reach. I could not reach the actual earpiece because it is burred under the main PCB and I could not figure out how to take it out.
Has anyone had a similar issue that they managed to fix? Is it even worth trying? If so, how can I remove the PCB without breaking something? It gives quite some resistance to removal.
Русский военный корабль, иди нахуй!